Home Blog Page 2

Anzu Robotics: Pioneering Innovations in Automation Technology

0
anzu robotics

Introduction:

This paper explores the importance of Anzu Robotics, its main products, applications in various sectors, and the direction of robotics in automation. Rising as a top inventor in the realm of automation, Anzu Robotics is creating innovative robotic solutions for various sectors. Anzu Robots distinguishes itself with sophisticated technology, precision engineering, and AI-driven robots as companies search for more intelligent and efficient automation solutions. 

anzu robotics

Uses of Anzu Robotics in Different Sectors

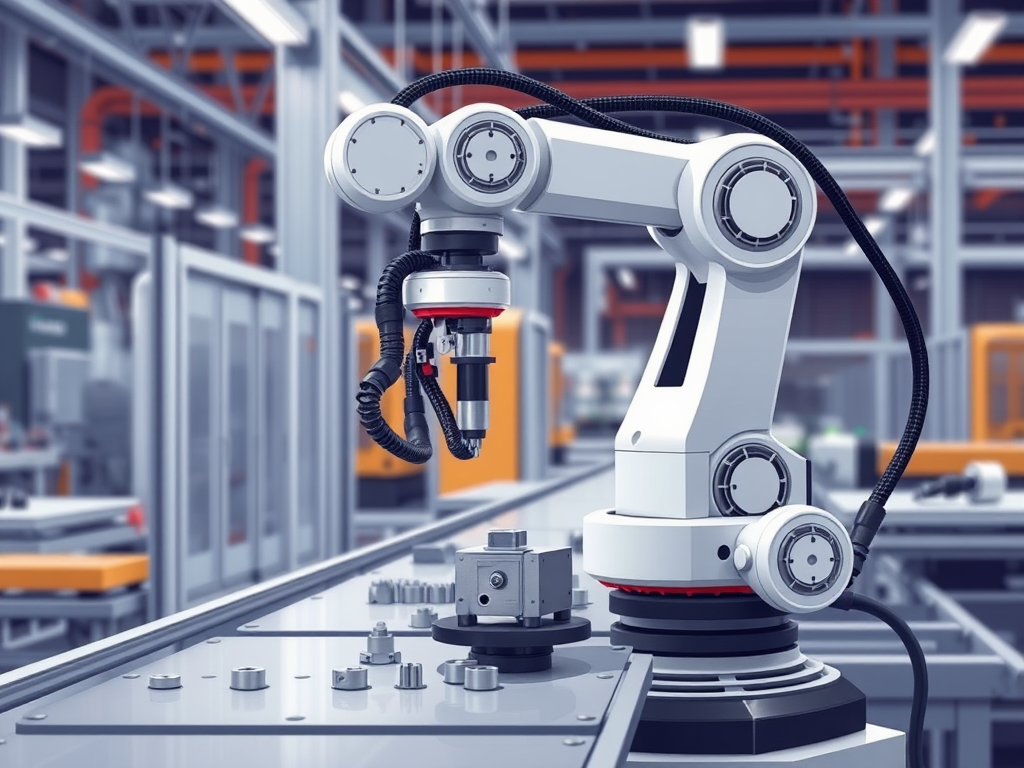
1. Industry and Manufacturing Automation

By deploying robots for assembly, quality control, and material handling, Anzu Robotics significantly helps to simplify production lines by so lowering human error and raising production rates.

2. Medical Robots and Healthcare

Anzu Robotics helps the medical industry using robotic-assisted surgeries, patient care automation, and medicine dispensing devices, thereby improving accuracy and lowering of medical professional workloads.

3. Warehousing and Logistic Support

By managing inventory control, automatic picking, and order fulfilment, all of which help to save processing time significantly, autonomous robots from Anzu Robotics maximise warehouse operations.

4. Smart Farming and Agriculture

Anzu Robotics offers autonomous drones and robotic systems for planting, harvesting, and crop health monitoring. With the advent of precision farming, agricultural output has increased.

5. Security and Defence

The development of autonomous surveillance drones, bomb disposal robots, and robotic exoskeletons by Anzu Robotics enhances security measures and contributes to defence technology.

Anzu Robotics’ Prospect in Automation

The demand for intelligent automation is expected to grow as sectors move toward complete digital transformation. Focusing on developing AI capabilities, raising robot adaptability, and enhancing human-robot cooperation, Anzu Robotics continues to invest in research and development. Anzu Robotics’ future lies in creating more innovative, autonomous technologies that fit perfectly into multiple sectors.

Anzu Robotics is what?

Developing sophisticated robotic solutions specifically for industrial, commercial, and healthcare uses is Anzu Robotics’ speciality. Emphasising Iot connectivity, machine learning, and artificial intelligence integration, Anzu Robotics wants to transform automation by raising productivity, lowering running costs, and increasing worker safety.

Key Characteristics of Anzu Robotics

1. Automation Inspired by AI

By adding artificial intelligence (AI) to their robots, Anzu Robotics helps them learn from past activities and adapt to various surroundings, thereby improving their efficiency over time.

2. Engineering Precision

The company guarantees the best performance in complex industrial operations by designing robots with exact sensors and actuators.

3. LOT and Cloud Linkivity

By incorporating Internet of Things (Iot) technologies, Anzu Robotics enables cloud-based remote control of robotic systems, real-time monitoring, and data analysis.

4. Customisation and Scalability

Their extremely scalable robotic solutions suit companies of all kinds and can be tailored to meet industry-specific requirements.

5. Effective Energy Consumption

Anzu Robotics ensures sustainability in automation by using energy-efficient motors and optimising power consumption.

READ MORE – Transform Your Home with 3d-Printed Viso TV Risers

FAQs:

1. Why are Anzu robots unique among other robot companies?

Anzu Robotics distinguishes itself by including Iot connectivity, powerful artificial intelligence, and energy-efficient solutions, thereby guaranteeing more innovative automation in various fields.

2. Which sectors does Anzu Robotics’ solutions help the most?

Automation solutions from Anzu Robotics greatly help sectors such as manufacturing, healthcare, logistics, agriculture, and defence.

3. Are the solutions of Anzu Robotics tailored for specific corporate requirements?

Indeed, Anzu Robotics provides scalable and adaptable robotic solutions designed to meet the specific needs of various sectors.

4. Are the solutions of Anzu Robotics fit for the current industrial infrastructure?

Most of Anzu Robotics’ products ensure a seamless transition to automation by being designed for perfect interoperability with existing industrial systems.

5. What are the following developments from Anzu Robotics anticipated?

Future developments include improved AI-driven robotics, autonomous mobile robots, and increased cooperation between robots and human workers.

Conclusion:

Offering creative, AI-powered robotic solutions, Anzu Robotics leads the way in transforming automation across various sectors. Emphasising accuracy, scalability, and efficiency, the company is likely to play a significant role in determining the direction of robotics and automation. Anzu Robotics remains a major contributor to driving intelligent automation solutions as companies continue to embrace digital transformation.

Transform Your Home with 3d-Printed Viso TV Risers

0
3d printed viso tv riser

Introduction

In today’s fast-paced world, home design is evolving rapidly, and technology plays a significant role in this transformation. Among the latest innovations, 3d printed Viso TV risers stand out as an essential addition to modern living spaces. These risers not only enhance the aesthetic appeal of your home but also provide functional benefits that cater to today’s needs. With the growing trend of home entertainment setups, many people are looking for practical ways to elevate their TVS for better viewing angles, improved organisation, and optimised sound performance. A 3d-printed Viso TV riser is an excellent answer that lets you keep expenses down and modify the design to meet your particular requirements.

3d printed viso tv riser

Ideal materials for a TV riser created through 3d 3D-printing

Selecting the correct material guarantees stability and lifetime. These are the best filament choices for a strong TV riser production:

1. PLA, or polylactic acid,

  • Advantages include Simple printing, being environmentally friendly, and a smooth finish.
  • Cons: Brittle under heavy loads
  • Best For: Small, lightweight TVS

2. PETG (Polyethene Terephthalate Glycol)

  • Pros: Stronger than PLA, flexible, impact-resistant
  • Cons: Requires a heated bed for printing
  • Best For: Medium-sized TVs, added durability

3. ABS (Acrylonitrile Butadiene Styrene)

  • Pros: Heat-resistant, durable, impact-resistant
  • Cons: More prone to warping during printing
  • Best For: Heavy TVs, high-temperature environments

4. Carbon Fibre-Infused Filament

  • Pros: Extreme strength, premium look
  • Cons: Expensive, requires a hardened steel nozzle
  • Best For: Large TVs or heavy-duty risers

Designing a 3D-Printed TV Riser

1. Measuring Your TV Base

  • Measure the width, depth, and weight of your TV stand.
  • Consider space for cables and accessories.

2. Selecting the Right Height

  • A height of 3-6 inches works well for most TV setups.
  • Higher risers allow for better cable management.

3. Choosing a Sturdy Structure

  • Use honeycomb infill for strength without excessive weight.
  • Reinforce with sidewalls and thick legs.

4. Adding Non-Slip Features

  • Include rubberised feet or TPU pads to prevent slipping.
  • Consider ventilation holes to improve airflow.

Why Choose a 3D-Printed TV Riser?

1. Custom fit and design

A 3d-printed TV riser lets you create it with the ideal proportions, height, and shape to fit your entertainment arrangement, unlike off-the-shelf risers.

2. Affordable Substitute

Although commercial TV risers can be costly, especially if you already have a 3D printer, a 3d-printed riser made at home is far more reasonably priced.

3. Enhanced Seeing Experience

An elevated TV improves ergonomics and reduces neck strain, thereby enhancing the comfort of viewing for extended periods.

4. Improve Sound Quality

Many TV stands block speakers designed for downward-firing. Custom risers guarantee correct sound dispersion and airflow.

5. Extra Space for Storage

Keeping your entertainment centre neat and orderly, a raised TV arrangement allows gaming consoles, media players, remotes, and cables room.

Common Issues and Troubleshooting

1. Warping During Printing

  • Solution: Use a heated bed and enclosure for materials like ABS.

2. Weak Load-Bearing Capacity

  • Solution: Increase the infill percentage and use a stronger filament, such as PETG or carbon fibre.

3. Poor Adhesion Between Parts

  • Solution: Use industrial-strength adhesives or design with snap-fit joints.

Printing and Assembly

1. Print Settings for Stability

SettingRecommended Value

Layer Height 0.2mm

Infill 30-50%

Nozzle Size 0.4-0.6mm

Bed Temperature 60-100°C

Print Speed 40-60mm/s

2. Assembling Multi-Part Risers

  • If printing in sections, use strong adhesives or screws to assemble.
  • Test the weight capacity before placing your TV on top.

3. Post-Processing for Durability

  • Sanding rough edges for a smooth finish.
  • Sealing with epoxy or primer for a sleek look.
  • Painting for customisation.

READ MORE – Buckethead’s ‘Giant Robot’: A Deep Dive into the Music and Sound

FAQs:

1. How much weight can a 3d-printed TV riser hold?

It depends on the material and design. PETG and ABS risers with 50% infill can support 30-50 lbs.

2. What software can I use to design a TV riser?

Popular options include Tinkercad (a beginner-friendly option), Fusion 360 (with advanced design features), and Blender (for custom modelling).

3. Can I 3d print a TV riser in multiple pieces?

Yes! If your print bed is small, print in sections and assemble with screws, glue, or interlocking joints.

4. How long does it take to 3D print a TV riser?

Depending on the layer height and print speed, a 12×6-inch medium-sized riser (with 30% infill) takes 10 to 15 hours.

5. Where might I find free STL TV riser files?

For free and premium 3D models, search websites including Thingiverse, Printables, My Mini Factory, and Cults3d.

Conclusion:

Whether your goals are bettering ergonomics, enhancing sound performance, or organising your entertainment area, 3D printing your custom TV riser is a great do-it-yourself project for both techies and home designers. A 3d-printed Viso TV riser is a reasonably priced, adaptable, and helpful tool for upgrading your home entertainment setup. You may build a strong, elegant, and useful TV riser by choosing the correct materials, designing optimally, and applying correct printing procedures.

Buckethead’s ‘Giant Robot’: A Deep Dive into the Music and Sound

0
buckethead giant robot flac

Introduction

If you’re looking to experience Giant Robot in lossless FLAC quality, this guide will walk you through everything you need to know, from the album’s history to where you can find high-quality downloads. Offering a mixed bag of experimental rock, funk, and metal, Giant Robot, one of Buckethead’s most beloved albums, is still a fan favourite in the field of instrumental rock and avant-garde guitar music. Buckethead is the enigmatic virtuoso noted for his unmatched shredding ability and odd attitude. 

buckethead giant robot flac

Where to Download Buckethead’s Giant Robot in FLAC?

If you’re looking for a legitimate and high-quality FLAC download, here are some recommended sources:

1. Official Music Libraries

  • Bandcamp — Buckethead guarantees premium versions like FLAC by selling many of his albums straight through Bandcamp.
  • Reputable source of lossless, high-resolution audio files: HDTracks

2. Internet FLAC Music Marketplaces

  • High-quality, lossless music downloads from Qobuz include several rock and experimental albums.
  • Another internet retailer where aficionados can buy premium FLAC files is 7digital.

3. Streaming in Lossless Format

  • Tidal HiFi – If you prefer streaming over downloading, Tidal provides lossless FLAC streaming for premium users.
  • Deezer HiFi – Offers FLAC streaming with high-fidelity audio.

How to Play FLAC Files?

Once you’ve downloaded Giant Robot in FLAC format, you’ll need a compatible media player to enjoy it. Here are some top recommendations:

For Windows & macOS:

  • Foobar2000 – A highly customisable and powerful audio player.
  • VLC Media Player – Supports FLAC playback without additional codecs.
  • MusicBee – Ideal for organising large music libraries in FLAC format.

For Mobile Devices:

  • Poweramp (Android) – One of the best FLAC players for Android users.
  • VLC (ios & Android) – A universal choice that supports FLAC playback.
  • Onkyo HF Player (ios) – Great for high-resolution audio files.

What is Buckethead’s Giant Robot?

  • Giant Robot is an album released by Buckethead in 1994 under the label Sony Japan. Genre: Experimental Rock, Avant-Garde Metal, Funk Release Date: 1994 Label: Sony Japan Notable Tracks: “Welcome to Bucketheadland,” “I Love My Parents,” “Giant Robot Theme” Unlike many of his later works, this album shows an eclectic mix of musical styles.
  • The album serves as a sonic exploration of Bucketheadland, a fictional amusement park often referenced in his work. The diverse instrumentation and unique compositions make this album a must-listen for any Buckethead fan.
  • One has better sound quality.
  • For aficionados, FLAC (Free Lossless Audio Codec) offers CD-quality audio without compression loss. FLAC preserves every subtlety of Buckethead’s complex guitar work, unlike MP3S, which trade sound details for smaller file sizes.

2. Excellent for Archiving

FLAC guarantees that should you be creating a premium music library, you maintain perfect audio quality free from concern for degradation over time.

3. Harmony with High-End Audio Equipment

Working with Hi-Fi music players, DACS (Digital-to-Analogue Converters), and professional audio configurations, FLAC files create an immersive listening experience.

READ MORE – Understanding 6-Axis Robot Mode: A Comprehensive Guide

FAQs:  

1. Where can I buy Buckethead’s Giant Robot in FLAC format?

You can purchase the album on Bandcamp, HD Tracks, and Qobuz for a high-quality, lossless experience.

2. Is it legal to download Buckethead’s music in FLAC for free?

Only if the artist or label has authorised a free download, otherwise, purchasing from official sources is the best way to support the artist.

3. How large is a FLAC album compared to an MP3?

FLAC files are 3-5 times larger than MP3S due to their lossless nature. A standard FLAC album typically ranges from 300MB to 800mb.

4. Can I convert FLAC to MP3?

Yes, you can use software like dBpoweramp, XLD (Mac), or Foobar2000 to convert FLAC files to MP3 while maintaining as much audio quality as possible.

5. Why does Buckethead release music in different formats?

Buckethead is well-known for embracing several styles to appeal to a larger audience. While MP3 offers a more sensible choice for general listeners, FLAC guarantees audiophiles have the highest quality.

Conclusion:

Whether you’re playing through Foobar2000, downloading from Bandcamp, or streaming on Tidal HiFi, FLAC offers a better sound experience that catches every subtlety of Buckethead’s artistry. Experimental and instrumental rock enthusiasts still consider Buckethead’s Giant Robot a must-have record. Getting the album in FLAC format guarantees the most extraordinary listening experience available for those who appreciate lossless audio quality. 

Understanding 6-Axis Robot Mode: A Comprehensive Guide

0
6 axis robot model

Introduction

Their six degrees of freedom help them replicate human arm motions, making them perfect for jobs that require precise motions. Everything related to 6-axis robot models, including their features, uses, advantages, and how they are revolutionising sectors around the world, will be covered in this extensive guide. In the realm of industrial automation and robotics, 6-axis robot models have become the gold standard for accuracy, adaptability, and cost-effectiveness. Manufacturing, healthcare, automotive, and many other sectors find great applications for these sophisticated robotic arms..

Applications of 6-Axis Robots Across Industries

1. Sector of the Automotive Industry

The automotive industry extensively uses 6-axis robots for assembly line automation, painting, and welding, thereby guaranteeing fast and highly precise operations.

2. Assembly and Manufacturing:

From PCB assembly to packaging, these robots improve overall product quality, reduce labour costs, and increase manufacturing efficiency.

3. Medical Robots and Healthcare

Six-axis robots are used in the medical profession for lab automation, surgical operations, and pharmaceutical manufacturing, to reduce human error and increase precision.

Fourth: Aerospace Sector

Six-axis robots ensure strict adherence to safety and quality criteria by assisting in aircraft component assembly, drilling, and material handling due to their high precision.

5. Food & Drink Sector

Maintaining hygiene and efficiency in vast food production, these robots assist in food processing, sorting, and packing.

Benefits of Using 6-Axis Robot Models

1. Enhanced Production

Using 6-axis robots helps to automate tasks, significantly increasing production speed while preserving accuracy and quality.

2. Economic Affordability

Although the initial outlay could be significant, 6-axis robots are a good investment considering labour savings, waste reduction, and energy economy.

3. Improved Workspace Safety

These robots handle dangerous jobs, therefore lowering worker injuries and guaranteeing adherence to occupational safety standards.

4. scalability and adaptability

Six-axis robots are pretty flexible, as they can be easily reprogrammed to fit changing industrial needs through modular programming and artificial intelligence integration.

5. Constant Superiority

Robots provide high-quality production with minimum mistakes by removing inconsistencies, unlike those of human labour.

What is a 6-axis Robot Model?

Designed with six degrees of freedom, a 6-axis robot model is an industrial robotic arm allowing movement along six separate axes. These axes help the robot to be exact and flexible in completing difficult jobs. The fundamental axes are:

  • The rotation of the whole arm at the base is axis 1.
  • Axis 2: Lower Arm Movement; moves the arm forward and backward.
  • Axis 3: Upper Arm Movement: Managers up and down action.
  • Axis 4’s Wrist Roll turns the wrist.
  • Wrist Pitch: Slides the wrist up and down along axis five.
  • Move the wrist left and right using axis 6.
  • Increased accuracy, adaptability, and efficiency in automation systems made possible by this degree of freedom help

Key Features of 6-Axis Robots

1. Repeatability and High Precision

Extreme accuracy—often exceeding ±0.02 mm—allows 6-axis robots to be suitable for businesses requiring exact assembly and quality control.

2. Adaptability in Movement

These robots are perfect for jobs that require careful handling and manipulation, as the six degrees of freedom allow them to move and operate in challenging surroundings.

3. Stiff Load Management

Six-axis robots are suitable for both light and heavy-duty uses, depending on the model, as they can handle payloads ranging from a few kilograms to several hundred kilograms.

4. Concurrent and Space-efficient Design

These robots are made to accommodate small offices, optimising productivity and lowering floor space needs, even if their sophisticated capability.

5. Concurrent with artificial intelligence and machine learning

Many current 6-axis robots have predictive maintenance and AI-driven motion control features, which let real-time changes for maximum efficiency and lowest downtime.

Choosing the Right 6-Axis Robot Model

  • When choosing a 6-axis robot, give the following some thought:
  • Ensure the robot can handle the necessary weight for your use.
  • The arm length of the robot will help you ensure it spans the required workspace.
  • Examining the robot’s task completion speed and efficiency helps one understand them.
  • Look for AI-powered models that integrate with your current systems relatively easily.
  • Weigh the initial outlay against long-term earnings and savings to get the cost against return on investment.

READ MORE –Complete Answer Key for the Robotics Word Scramble

FAQs:  

1. What makes a 6-axis robot different from other industrial robots?

A 6-axis robot has six degrees of freedom, offering greater flexibility and precision compared to 4-axis or SCARA robots, which have limited motion capabilities.

2. Can a 6-axis robot work alongside humans?

Yes, collaborative 6-axis robots (cobots) are designed with safety features like force-limiting sensors and automatic stop mechanisms, allowing safe human-robot interaction.

3. How much does a 6-axis robot cost?

Prices range from $20,000 to over $100,000, depending on size, payload capacity, and additional features like AI integration.

4. What programming languages are used for 6-axis robots?

Common languages include Python, C++, and proprietary robot programming languages like KUKA KRL, ABB RAPID, and Fanuc TP.

5. Are 6-axis robots suitable for small businesses?

Yes! Many affordable and compact models are available for small-scale manufacturing and automation, making them a viable option for small businesses.

Conclusion

Offering accuracy, efficiency, and scalability in automation, the 6-axis robot model is transforming sectors. These robots increase productivity, save costs, and improve workplace safety in manufacturing, healthcare, and aerospace. Expect ever more clever, AI-powered robotic devices that challenge automation limits as technology advances.

Complete Answer Key for the Robotics Word Scramble

0
robotics word scramble answer key

Introduction

EWord scrambles can be a fun and educational way to engage with robotics terminology. This guide provides the answer key to your robotics word scramble, making it easier to check your work and enhance your learning experience. Especially in the field of robotics, word scramble puzzles are an engaging and participatory way to reinforce knowledge. Solving robotics-themed word scrambles will increase your understanding of essential terms and ideas, interestingly, regardless of your level of interest in robotics—that of a student, teacher, or hobbyist.

This tutorial will cover their advantages, provide ideas on how to use them for both leisure and education, and include a complete response key for robotics word scrambles.

robotics word scramble answer key

Why Apply Robotics Word Scrambles?

1. Improving Term Count

A fast-developing discipline with a broad spectrum of technical language is robotics. Essential vocabulary, including servo, actuator, algorithm, and automation, is easier to memorise with word scrambles.

2. Improving Problem-Solving Techniques

Correcting jumbled words improves pattern identification and problem-solving ability, therefore enhancing cognitive skills.

3. Fun Learning for All Ages

Whether you’re a beginner or an expert, robotics word scrambles provide an entertaining way to test and expand your robotics knowledge.

4. Ideal for STEM Education

Teachers and educators can use word scrambles as interactive learning tools to make STEM (Science, Technology, Engineering, and Mathematics) subjects more engaging.

Common Robotics Word Scramble Answer Key

Below are frequently scrambled robotics-related words along with their solutions:

Scrambled WordAnswer

  • VROBETO ROBOT
  • OTRCINOTL CONTROL
  • GRSNSEO SENSOR
  • OITAMAUOTN AUTOMATION
  • MEORFGRP PROGRAM
  • OTARCTAU ACTUATOR
  • NRELEGINAE ENGINEER
  • AETLDIGI DIGITAL
  • MSLBEMASY ASSEMBLY
  • ETICSROECL ELECTRICS

How to Use Word Scrambles for Learning

1. Classroom Activities

  • Educators can use word scrambles as part of STEM lesson plans.
  • Assign students a word scramble challenge before introducing a new robotics concept.

2. Robotics Clubs & Competitions

  • Robotics teams can incorporate puzzles into training sessions to strengthen team knowledge.
  • Hosting word scramble competitions adds an element of fun to learning.

3. DIY Robotics Projects

  • Use word scrambles to reinforce terminology before building a robotics project.
  • Create custom word scrambles featuring components of the robot you’re assembling.

4. Online Learning & Quizzes

  • Interactive word scramble games can be integrated into e-learning platforms.
  • Robotics educators can create digital word scramble worksheets for online students.

Tips for Solving Word Scrambles

1. Identify Prefixes & Suffixes

  • Look for common robotics-related prefixes like auto- (automation) and suffixes like -bot (robotics-related words).

2. Rearrange Letters in Groups

  • Break down the scrambled word into smaller segments and try different letter combinations.

3. Use Context Clues

  • If the word scramble is part of a lesson, use the topic being discussed as a hint.

4. Try Writing It Out

  • Writing the letters down in different orders can visually aid problem-solving.

READ MORE- Essential Guide to Replacing the Brush on Your SoftBank Robotics Scrubber 50

FAQs: 

1. What are the most common robotics terms used in word scrambles?

Common robotics-related words in scrambles include automation, actuator, control, engineer, sensor, and robotics.

2. How can I create my robotics word scramble?

Online word scrambles, such as WordMint, or handcrafted scrambles using words related to robotics, can be used.

3. Are word scrambles related to robotics appropriate for any age range?

Indeed. By varying difficulty degrees, they can be customised for expert learners, students, and beginners.

4. In STEM education, how may word scrambles support learning?

Word scrambles help to increase problem-solving abilities, vocabulary, and make learning robotics enjoyable.

5. Where can I find more robotics word scrambles?

You can find robotics word scrambles in STEM activity books, online learning platforms, and educational websites.

Conclusion

Using this answer key, you can quickly check your solutions and deepen your understanding of robotics terminology. Enjoy the challenge and keep learning! If you have any questions or need further assistance, feel free to ask. Robotics word scrambles are an exciting and educational way to strengthen knowledge of robotics terminology. Word scrambles are a fun and interesting learning tool for teachers looking for an engaging classroom activity, students eager to expand their robotics vocabulary, or robotics enthusiasts enjoying brain puzzles.

Including word scrambles in STEM education can improve learning outcomes and increase enthusiasm for robotics and engineering.  Start today with robotics word scrambles to test your brain and increase your robotics knowledge!

Essential Guide to Replacing the Brush on Your SoftBank Robotics Scrubber 50

0
softbank robotics scrubber 50 brush replacement

Maintaining your SoftBank Robotics Scrubber 50 is crucial for ensuring optimal performance and longevity. One of the key maintenance tasks is replacing the brush, which can wear out over time due to regular use. This guide provides clear, step-by-step instructions for replacing the brush efficiently. Primarily used in commercial and industrial environments, the SoftBank Robotics Scrubber 50 is a sophisticated autonomous floor cleaning solution. Like any cleaning device, regular maintenance is essential to ensure optimal operation. The Scrubber 50 brush is one of the most important things to replace. Brushes deteriorate over time, which lowers their cleaning effectiveness and may damage flooring surfaces.

Detailed Guide for Changing the Scrubber 50 Brush

1. Turn off and get the machine

Turn off the Scrubber 50, then detach it from the power supply.

For simpler access, move it to a level, solid surface.

2. Take out the old brush

  • Find the brush mounting device.
  • Press the release lever or undo the screws depending on the model to release the old brush.

3. Tidy the brush residence

  • Clear any trash or dirt from the brush compartment.
  • Before you install the new brush, look for broken parts.

4. Install the new brush

  • Orient the fresh brush in line with the mounting system.
  • Pressing the locking mechanism into position will secure it.
  • Make sure it spins unhindered.

5. Examine the machine

  • For any odd performance problems, vibrations, or noises.
  • Re-connect the power and execute a test cycle.
  • Look at Maintenance Advice to Maximise Brush Life

Maintenance Tips to Extend Brush Life

1. Should schedule regular cleaning

Rinse the brush after each use to remove collected dirt and debris.

2. Spin brushes for consistent wear

Periodically rotate or switch brushes depending on your Scrubber 50 to prevent uneven wear.

3. Store the Machine Properly

Avoid leaving the brush in constant contact with the floor when not in use to maintain its shape.

4. Follow Manufacturer Guidelines

Adhere to SoftBank Robotics’ recommended maintenance schedule for brush replacement and cleaning.

Where to Buy SoftBank Robotics Scrubber 50 Brushes

1. Official SoftBank Robotics Distributors

Buying straight from approved SoftBank Robotics distributors guarantees original replacement components.

2. Online Stores of Retailers

Replacement brushes are available on websites like Amazon, eBay, and industrial supply stores; always confirm authenticity.

3. Regional Equipment Providers

Ask commercial cleaning supply companies about availability and professional advice.

The Need to Change the Scrubber 50 Brush

1. Preserving Effective Cleaning

A worn-out brush could cause poor scrubbing, leaving filth and grime behind. Changing the brush ensures the Scrubber 50 maintains good cleaning standards.

2. Preserving Floor surfaces

Overused brushes can become abrasive and potentially damage floors.  A prompt replacement protects fragile surfaces.

3. extending machine lifetime

By adding brush replacement to regular maintenance, the engine and components of the machine are less stressed, therefore prolonging the Scrubber 50’s total lifetime.

Signs You Need to Replace the Scrubber 50 Brush

1. Visible Wear and Tear

If you notice that the brush bristles are frayed, flattened, or uneven, it’s time to replace it.

2. Slowed-down Cleaning Performance

A drop in cleaning efficiency—that which requires several passes to remove dirt—indicates that the brush is no longer effective.

3. Unnatural Sounds during Operation

Unusual sounds or too strong vibrations could indicate misalignment or excessive wear on the brush.

4. Floor scrapes or streaks

If the Scrubber 50 is leaving streaks or marks on the floor, the brush may no longer be functioning correctly.

How to Choose the Right Scrubber 50 Brush

SoftBank Robotics offers a variety of brush types for different surfaces and cleaning needs. Here’s how to choose the right one:

1. Brush Material

Ideal for most floor types, polypropylene brushes are for general-purpose cleaning.

Perfect for heavy-duty cleaning and difficult stains are abrasive grit brushes.

  • Suitable for fragile surfaces, nylon brushes help reduce the risk of scratches.

2. Brush Compatibility and Size

Ensure the replacement brush fits the mounting system and has the same diameter as the current Scrubber 50 brush.

3. Manufacturer-approved brushes

Using OEM (Original Equipment Manufacturer) brushes guarantees fit and preserves the performance of the Scrubber 50.

READ MORE – Challenge Yourself with the ‘Prove You’re Not a Robot’ Game

FAQs:

1. How often should I replace the Scrubber 50 brush?

Replacement frequency depends on usage and floor type, but typically ranges from 3 to 6 months.

.

2. Can I use third-party brushes on the Scrubber 50?

While third-party brushes may fit, using OEM-approved brushes is recommended for optimal performance and machine longevity.

3. How do I clean the Scrubber 50 brush after each use?

Rinse the brush thoroughly with warm water and mild detergent, then let it dry completely before use.

4. What should I do if my new brush doesn’t fit?

Double-check the model compatibility and mounting mechanism. If issues persist, contact SoftBank Robotics support.

5. Can I extend the lifespan of my Scrubber 50 brush?

Yes! Regular cleaning, proper storage, and rotating multiple brushes can maximise longevity and maintain efficiency.

Conclusion:

Replacing the brush on your SoftBank Robotics Scrubber 50 is a straightforward process that can significantly enhance its cleaning capabilities. By following these steps and performing regular maintenance, you can keep your robot effective and efficient for years to come. Maintaining the cleaning efficacy of the SoftBank Robotics Scrubber 50 depends on regular brush change, which also helps to safeguard your floors. You can guarantee the best performance and lifetime for your Scrubber 50 by selecting the suitable brush type, following the correct installation techniques, and keeping it properly maintained.

Always choose OEM-approved brushes and follow the manufacturer’s maintenance guidelines for optimal results. Whether you purchase from an authorised dealer, online retailer, or local supplier, investing in quality replacement brushes will keep your Scrubber 50 running smoothly for years to come.

Challenge Yourself with the ‘Prove You’re Not a Robot’ Game

0
prove your not a robot game

Introduction

In a world increasingly dominated by technology, the “Prove You’re Not a Robot” game offers a refreshing and entertaining way to test your human instincts against artificial intelligence. This interactive challenge is designed to engage players in a series of fun tasks that highlight the unique qualities of human thought and creativity. In a world where artificial intelligence (AI) is developing rapidly, it becomes increasingly complex to distinguish between humans and computers. “Prove You’re Not a Robot” games, which challenge human intuition, problem-solving, and creative thinking, have emerged as a result. 

What Is the “Prove You’re Not a Robot” Game?

An interactive challenge designed to distinguish humans from automated bots is a ‘Prove You’re Not a Robot’ game. These games guarantee that only a real human can complete by using cognitive assessments, pattern recognition, and real-world logic. Some are funny, while others are complicated and require problem-solving skills.

How These Games Work

  • Logic Puzzles – Simple or complex questions that require reasoning, such as math problems or lateral thinking tests.
  • CAPTCHA-Style Tests – Identifying objects in images, solving distorted text puzzles, or dragging objects into the correct locations.
  • Dexterity Challenges – Requiring precise mouse movements or unique keyboard inputs that bots struggle to replicate.
  • Human Creativity-Based Tasks – Some games ask users to write a short response or perform an action that requires imagination.

Why Are “Prove You’re Not a Robot” Games Popular?

The increasing presence of AI and bots in online spaces has made human verification more critical than ever. These games have become a fun and engaging way to test one’s cognitive skills while also providing security and entertainment.

1. Enhancing Cybersecurity

Human verification challenges are used on many websites and platforms to stop spam, fraud, and automated bots from accessing limited information. Similar ideas in games provide an additional degree of protection and simplify the procedure, therefore making it more fun. .

2. Fun and Engaging for Players

Rather than a boring CAPTCHA check, these games provide interactive challenges that keep users entertained.

3. Testing AI Limitations

AI may be able to solve complex mathematical problems, but it still struggles with creative thinking and unpredictable human behaviour. These games highlight the areas where AI still falls short.

Games That Prove You’re Not a Robot: 

Google routinely uses CAPTCHA-based games, such as recaptcha Challenges, to validate users by selecting objects in photos or completing simple puzzles.

Click the Traffic Light to determine whether a player is human quickly—a basic but efficient method.

2. Riddle-based games in Logic

  • Not a Robot Test is a browser-based game challenging users with riddles, pattern identification, and logic puzzles.
  • Impostor Detector – A game inspired by the concept of the Turing Test, where players must prove their humanity by answering creative and abstract questions.

3. AI vs. Human Challenges

  • Quick, Draw! – A game that challenges users to doodle objects and see if an AI can recognise them.
  • Bot or Not? – A game where players determine if a human or an AI wrote a given response.

How to Win at “Prove You’re Not a Robot” Games

1. Think Like a Human, Not a Machine

If you’re struggling with these games, here are some tips to improve your chances of winning:

Think Human, Not Like a Machine.

Most tasks are meant to target aspects like lateral thinking, comedy, and erratic behaviour, where bots suffer. If a query seems clear-cut, challenge yourself to consider unconventional answers.

2. Focus on Details.

Certain games will try to fool you by asking complex questions or making minute picture variations.

3. Approach Time-Based Challenges patiently.

Many tests call for more accuracy than speed. Spend some time ensuring that drag-and-drop problems or pattern recognition tasks are accurate.

4. Use Creative Answers

If the game requires a written response, be original. AI often struggles with humour, sarcasm, and nuanced expressions, so these can work in your favour.

READ MORE – Organise Your Workspace with Creative Cardinal Pen Holder 3d Prints

FAQs:

 1. Why are these games designed?

By verifying that users are human, these games provide an entertaining and engaging way to prevent bots from accessing specific services or content.

2. Are these games difficult to complete?

Most of these games are designed to be challenging but solvable for humans while being difficult for AI and bots.

3. Can AI eventually solve these games?

While AI is improving rapidly, many “Prove You’re Not a Robot” games rely on creativity, logic, and human intuition—areas where AI still struggles.

4. Where can I find and play these games?

Many browser-based games exist, and sites like recaptcha, Quick, Draw!, and Not a Robot Test offer fun variations.

5. Can I create my own “Prove You’re Not a Robot” game?

Yes! With tools like Scratch, Unity, or Python, you can design and develop your own human verification game.

Conclusion:

The “Prove You’re Not a Robot” game is more than just a test; it’s an opportunity to engage with friends and challenge your mind in a fun way. By embracing the quirks and creativity that make us human, this game provides a delightful reminder of the unique traits that set us apart from machines. Gather your friends, start the game, and enjoy the fun of proving you’re not a robot!

The Prove You’re Not a Robot game challenges both humans and artificial intelligence in an engaging and participatory manner rather than only serving security needs. These games will grow much more imaginative and sophisticated as artificial intelligence develops, challenging conventional wisdom on what it means to be human.

Organise Your Workspace with Creative Cardinal Pen Holder 3d Prints

0
cardinal pen holder 3d print

A well-organised workspace not only boosts productivity but also adds a touch of personality to your environment. Cardinal pen holders are a fun and functional way to keep your writing instruments tidy. With the advent of 3D printing, creating your custom designs has never been easier or more enjoyable. This all-inclusive guide will go over the advantages of 3D printing a cardinal pen holder, the best materials and settings for optimum results, detailed instructions, and fixes to typical printing problems. Whether your interests are professional or recreational, this guide will enable you to print a gorgeous and functional cardinal pen holder effectively.

cardinal pen holder 3d print

Step-by-Step Guide to 3D Printing a Cardinal Pen Holder

Step 1: Find or Design a 3D Model

You can download a cardinal pen holder STL file from platforms like Thingiverse, MyMiniFactory, or Cults3D. Alternatively, you can design your own using 3D modeling software like Blender, Tinkercad, or Fusion 360.

Step 2: Prepare Your 3D Printer and Filament

  • Load the chosen filament into the printer.
  • Level the bed to ensure proper adhesion.
  • Clean the print surface for better adhesion.

Step 3: Slice the Model

  • Use slicing software like Cura or PrusaSlicer to generate the G-code.
  • Set appropriate print settings for material and design complexity.
  • Enable support if needed for overhangs.

Step 4: Start the Print

  • Monitor the first few layers to ensure proper adhesion.
  • If needed, adjust the settings mid-print for optimal results.

Step 5: Post-Processing and Finishing

  • Remove supports carefully using pliers or a knife.
  • Sand any rough edges for a smoother finish.
  • Optionally, paint or coat the model for an enhanced look.

Why 3D Print a Cardinal Pen Holder?

1. Original and Beautiful Architecture

Any workstation would look great with a visually arresting pen holder with cardinals. Both professionals and creatives would find the cardinal to be a great choice because of its symbolic meaning—that of vigor and inspiration.

2. Economical and Customizable

Custom pen holders created using 3D printing can be had at a fraction of the price of bought ones. Its dimensions, form, or detailing can be changed to fit your particular demand.

3. Useful and Space-Saving

Designed to store several pens, markers, or pencils, a card holder keeps your desk orderly and adds a decorative touch to your workstation.

4. Fantastic for Personal Projects and Gifts

Offering a mix of function and appeal, this design makes the ideal gift for office workers, students, or bird enthusiasts.

Ideal materials for 3D printing a cardinal pen holder

A good print depends on choosing the correct filament. The ideal materials for printing your cardinal pen holder are these:

  • 1. PLA (polylactic acid)
  • Cons: Less durable than other materials, can become brittle over time.

2. PETG (Polyethene Terephthalate Glycol)

  • Pros: Strong, water-resistant, durable.
  • Cons: Requires precise print settings for best results.

3. ABS (Acrylonitrile Butadiene Styrene)

  • Pros: High durability, impact-resistant, heat-resistant.
  • Cons: Prone to warping, requires a well-ventilated area for printing.

4. Resin (For SLA Printers)

  • Pros: Excellent detail, smooth finish, ideal for intricate designs.
  • Cons: Requires post-processing and UV curing, higher material cost.

Recommended Print Settings for a Cardinal Pen Holder

To achieve the best print quality, follow these recommended settings:

  • Layer Height: 0.1 – 0.2 mm (for fine details)
  • Print Speed: 40-60 mm/s
  • Infill Density: 15-30% (for a balance of strength and material efficiency)
  • Wall Thickness: 2-3 mm
  • Nozzle Temperature:
  • PLA: 190-220°C
  • PETG: 220-250°C
  • ABS: 230-250°C
  • Bed Temperature:
  • PLA: 50-60°C
  • PETG: 70-90°C
  • ABS: 90-110°C
  • Cooling Fan:
  • PLA: 100%
  • PETG & ABS: 50% or lower to prevent warping

Common Issues and Troubleshooting

1. Use a heated bed, a glue stick, or painter’s tape, and ensure the bed is level.

2. Stringing or Oozing Solution, In the slicing program, lower the nozzle temperature and activate retraction settings.

Solution for weak structure or layer separation: Raise wall thickness and infill density to guarantee appropriate extrusion settings.

3. For the extruder, lower the extrusion multiplier and calibrate steps per mm using blobby prints.

READ MORE – Secure Your Shots with Innovative Bullet Camera Holder 3D Prints

FAQs:

1. Where can I find a free STL file for a cardinal pen holder?

You can find free STL files on Thingiverse, MyMiniFactory, and Printables.com.

2. What is the best filament for a durable pen holder?

PETG and ABS are the best options for durability and strength.

3. How long does it take to 3D print a cardinal pen holder?

Depending on the size and print settings, it can take between 4 and 10 hours.

4. Can I resize the model to hold more pens?

Yes, you can scale the model in your slicing software before printing.

5. How do I improve the print quality of intricate details?

Use a 0.1 mm layer height, slower print speed, and a fine-tuned cooling system for best results.

Conclusion:

3D printed cardinal pen holders are a fantastic way to blend functionality with creativity in your workspace. By designing your own, you can make a unique statement while keeping your pens organised. Dive into the world of 3D printing and let your creativity soar, making your workspace not only neat but also a reflection of your personality! An interesting and valuable project that gives your workstation structure and inventiveness is a cardinal pen holder 3D print. Following the correct materials, print settings, and troubleshooting methods will help you to produce a sturdy and attractive pen holder. This project highlights 3D printing and customisation’s attractiveness for either personal use or as a gift. 

Secure Your Shots with Innovative Bullet Camera Holder 3D Prints

0
bullet camera holder 3d print

Introduction

In the world of photography and videography, having a reliable camera holder is crucial for capturing the perfect shot. Bullet camera holders, designed for stability and versatility, are essential tools for both amateur and professional photographers. With the rise of 3D printing, customising these holders has never been easier. A bullet camera holder 3D print is a must-have item for mounting cameras in many areas in the era of smart home security and surveillance. 3D printing offers a flexible solution, whether your needs call for a replacement for a broken camera holder or a custom-fit, sturdy mount with economy. With the ability to customise angles, materials, and dimensions, 3d-printed bullet camera holders offer users a tailored approach to security camera placement.

bullet camera holder 3d print

Best Filament and Resin for Bullet Camera Holders

1. PETG (Best for Outdoor Durability)

  • Resistant to weather, heat, and UV exposure.
  • Tougher and more flexible than PLA.

2. ABS (Stronger and Impact-Resistant)

  • Withstands high temperatures and physical stress.
  • Requires an enclosed printer for best results.

3. ASA (Best for Extreme Outdoor Conditions)

  • Superior UV resistance for long-term outdoor use.
  • Higher mechanical strength and chemical resistance.

4. Resin (For High-Precision Parts)

  • Tough or ABS-like resin provides impact resistance.
  • Smooth surface finish for aesthetic mounting brackets.

How to 3D Print a Bullet Camera Holder Successfully

Step 1: Choose the Right Design

  • Download a pre-designed STL file or create your own.
  • Ensure the mount has reinforced joints for added strength.

Step 2: Slice the Model Correctly

  • Use Cura (FDM) or Lychee Slicer (resin) for print preparation.
  • Recommended settings:
    • Layer Height: 0.2mm for strength.
    • Infill: 50-100% for durability.
    • Supports: Enable for overhanging parts.

Step 3: Print the Holder

  • Monitor the first layers to prevent warping.
  • Use a heated bed set to 60-90°c for PETG and ABS.
  • Print at a slow speed (40-60mm/s) for better adhesion.

Step 4: Post-Processing and Installation

  • Remove supports carefully to avoid breaking small parts.
  • Sand and paint (if needed) for a professional look.
  • Use stainless steel screws for mounting security.

Creative Ways to Use 3D-Printed Bullet Camera Holders

1. Can modify the wall mounts by

Swivel and tilt for improved surveillance viewing.

2. Wider Angles and Corner Mounts

ideal for protecting driveways and significant access points.

3. Mount Adanners from the Ceiling

permits discrete, high-angle placement.

4. Bracket Mount Poles

On light posts, fences, or poles, secure cameras.

  • 5. Hidden Camera Mounts

 Subtle designs for enhanced security protocols.

Why Use a 3D-Printed Bullet Camera Holder?

1. Custom Fit for Any Camera Model

  • Standard mounts may not always fit specific camera brands or models.
  • 3D printing allows for customised designs to match exact camera specifications.

2. Cost-Effective Solution

  • OEM camera mounts can be expensive or hard to find.
  • 3D printing provides an affordable alternative without sacrificing quality.

3. Durable and Weather-Resistant Materials

  • Use strong materials like PETG, ABS, or ASA to withstand outdoor conditions.
  • Reinforced designs improve durability against wind, rain, and UV exposure.

4. Flexible Mounting Options

  • Adjustable swivel and tilt functions can be integrated into the design.
  • Custom brackets allow for wall, ceiling, or pole mounting.

Where to Find Bullet Camera Holder 3D Print Files

1. Thingiverse

Free STL files suitable for several camera holders.

  • Designs obtained from communities with changeable elements

2. MyMiniFactory

  • High-quality, tested 3D models.
  • Well-optimised designs for easy printing.

3. Cults3d

  • Premium and free STL files for bullet camera mounts.
  • Unique designs are available for specific camera brands.

4. Printables

  • A popular resource for DIY security camera holders.
  • User-submitted designs with detailed print settings.

5. Custom CAD Design (Fusion 360, Tinkercad, or Blender)

  • Design a custom camera holder to meet your specific needs.
  • Modify existing designs for a better fit and stability.

Best 3D Printers for Bullet Camera Holders

To ensure high-quality and durable prints, selecting the right 3D printer is crucial.

FDM Printers (Best for Strength and Durability)

  • Creality Ender 3 V2 – Affordable and fantastic for PETG/ABS prints.
  • Prusa i3 MK3S+ – High-quality prints with advanced reliability.
  • Anycubic Kobra – Budget-friendly with auto-bed levelling.

Resin Printers (Best for High Precision and Small Parts)

  • Elegoo Mars 3 – Ideal for detailed, small components.
  • Anycubic Photon Mono X – Great for firm and smooth resin prints.
  • Phrozen Sonic Mini 8K – Extreme detail for complex designs.

READ MORE – levate Your Gameplay with Custom Board Game Clip 3D Prints

FAQs:  

1. What is the best material for 3d-printed bullet camera holders?

PETG and ASA are ideal for outdoor durability, while ABS provides strong impact resistance.

2. Can I 3D print a custom mount for any bullet camera?

Yes! Many STL files are available, or you can design your own for a perfect fit.

3. How do I prevent warping in my 3d-printed camera mount?

  • Use a heated bed, especially for ABS.
  • Enable brims or rafts for better adhesion.

4. Are 3d-printed camera mounts strong enough for outdoor use?

Yes, if printed with high-quality filament (PETG, ASA) and high infill (50-100%).

5. Where can I buy pre-printed bullet camera mounts?

Etsy, eBay, and specialised 3D printing services offer custom camera holders.

Conclusion

3D printed bullet camera holders offer a practical solution for photographers and videographers looking for stability and customization. By leveraging the benefits of 3D printing, you can create innovative designs that enhance your shooting experience, ensuring that you capture every moment with precision and style. Dive into the world of 3D printing and secure your shots today! Mounting security cameras may be done affordably, customer, and durably using a 3d-printed bullet camera holder. Strong, weather-resistant camera mounts catered to your needs can be created with the correct 3D printer, materials, and STL files. Whether for home security, business surveillance, or DIY projects, 3D printing offers endless possibilities for enhancing camera placement and security.

levate Your Gameplay with Custom Board Game Clip 3D Prints

0
board game clip 3d print

Introduction

Board games are a fantastic way to bring friends and family together for fun and strategic play. However, managing game pieces can sometimes be a hassle. Enter 3D printed board game clips, an innovative solution that enhances your gaming experience. Board games have been a source of entertainment for generations, but as gaming evolves, so does the need for custom accessories. One of the most practical enhancements for tabletop gaming enthusiasts is the board game clip 3D print, a simple yet effective way to organise game pieces, track scores, and improve overall gameplay. As 3D printing becomes more popular, players may now make Custom clips fit for their preferred board games, hence improving flair and usefulness. 

board game clip 3d print

How to 3D Print Board Game Clips Successfully

Step 1: Choose the Right Design

  • Download a ready-made STL file or design your own using Tinkercad or Fusion 360.
  • Ensure dimensions match the board game components.

Step 2: Slice the Model

  • Use Cura (for FDM) or Lychee Slicer (for resin).
  • Set the appropriate layer height (0.1-0.2 mm for details).
  • Enable support for overhanging parts.

Step 3: Print the Clip

  • Ensure the print bed is level.
  • Monitor the first few layers to prevent warping.

Step 4: Post-Processing

  • Remove supports carefully to avoid damaging small details.
  • Sand and paint (optional) for a premium finish.
  • Use clear coat or resin curing for added durability.

Creative Ways to Use 3D-Printed Board Game Clips

1. Card Holders for Strategy Games

  • Clip-on card stands for games like Terraforming Mars or Ticket to Ride.

2. Player Turn Markers

  • Customisable clips with numbers or colours to track turns.

3. Score Trackers

  • Clip-on dials or sliders for keeping track of the score.

4. Tile Holders for Word Games

  • Organise Scrabble or Catan tiles with ease.

5. Expansion Storage Solutions

  • Keep extra pieces, tokens, or expansion cards securely clipped

Why Use 3D-Printed Board Game Clips?

1. Better Organisation

  • Keep game pieces in place – Clips prevent cards, tokens, or tiles from shifting.
  • Streamline scoring systems – Clip-on trackers help monitor points or player progress.

2. Personalisation and Customisation

  • Match your board game with one of the several styles and colours available.
  • Create personal gaming experiences by engraving names or symbols.

3. Reasonably priced solution

  • Oftentimes, 3D printing is less expensive than purchasing unique items.
  • Makes replacement simple, should the clips break or disappear.

4. Eco-friendly substitute

  • Printing just what you need will help to cut plastic waste.
  • Use PLA and other biodegradable polymers for environmentally friendly gaming gear.

Where to Find Board Game Clip 3D Print Files

1. Thingiverse

  • Free STL files for board game clips.
  • Community-driven with customisable models.

2. MyMiniFactory

  • High-quality, curated 3D models.
  • Many optimised STL files for tabletop gaming.

3. Cults3d

  • Exclusive premium and free board game accessories.
  • Features a variety of creative designs for clips and organisers.

4. Printables

  • Popular among DIY board game enthusiasts.
  • Offers detailed print settings and user feedback.

5. Etsy

  • Some designers sell pre-printed clips and STL files.
  • Great for those looking for custom or commissioned designs.

Best 3D Printers for Board Game Clips

To ensure high-quality prints, choosing the right 3D printer is essential.

FDM Printers (Budget-Friendly & Durable)

  • Creality Ender 3 V2 – Reliable and affordable for casual printing.
  • Prusa i3 MK3S+ – Excellent quality with advanced features.
  • Anycubic Kobra – User-friendly with auto-bed levelling.

Resin Printers (Best for Fine Detail)

  • Elegoo Mars 3 – High-resolution resin prints.
  • Anycubic Photon Mono X – Larger print area for batch printing accessories.
  • Phrozen Sonic Mini 8K – Extreme detail for customised clips.

Best Filament & Resin for Board Game Clip

1. PLA (Best for General Use)

  • Easy to print and environmentally friendly.
  • Available in multiple colours and finishes.

2. PETG (More Durable & Flexible)

  • Stronger than PLA, ideal for clips that need to be snapped onto boards.
  • Heat and impact resistant.

3. ABS (For Advanced Users)

  • High strength and resistant to wear.
  • Requires enclosed printers to prevent warping.

4. Resin (For High-Detail Clips)

  • Smooth surface finish for professional-looking clips.
  • Tough resin for improved durability.

READ MORE – Enhance Your Creations with Black Claw 3D Print Designs

FAQs:

1. What size should I print the board game clips?

The size depends on the thickness of the game board or cards. Most clips range from 10mm to 30mm in width.

2. Can I print board game clips with a basic 3D printer?

Yes! Even entry-level 3D printers like the Ender 3 can print functional board game clips.

3. What is the best material for flexible board game clips?

PETG and TPU are ideal for flexible clips, while PLA is best for rigid clips.

4. How might I create my own board game clip?

Custom clips can be created with Tinkercad, Fusion 360, or Blender. Ensure the design fits snugly on the board.

5. Where may I find pre-printed board game clips?

Pre-made 3D-printed board game clips are sold via Etsy, eBay, and specialist gaming accessory stores.

Conclusion

Custom board game clip 3D prints offer a practical and creative solution for tabletop gamers. By enhancing organization and usability, these clips can significantly improve your gaming experience. Dive into the world of 3D printing and discover how these innovative designs can elevate your game nights! The 3D print trend in board games is changing our organisation and playing style. With the right 3D printer, filament, and STL files, you can create customised, durable, and stylish board game accessories that enhance your gaming experience. For board game aficionados, 3D printing has countless opportunities, whether your needs are for tiles, cards, or score tracking.