Reliable connections for data communication are created in the area of networking mostly by the RJ45 connector. Anyone wishing to build a wired network—personal or for business—must first be familiar with the wiring schematic for an RJ45 connector. The complexities of RJ45 wiring, the several standards, and useful advice to guarantee the best performance will be covered in this tutorial.
An RJ45 Connector is What?
Commonly used standard networking connectors for Ethernet cables are the RJ45 connectors. Its eight pins let data be sent across twisted-pair connections. Local area networks (LANs) make extensive use of the RJ45 connector so that devices, including PCs, routers, and switches, may properly interact.
Why Use RJ45 Connectors?
- Versatility: RJ45 connectors fit Cat5, Cat5e, Cat6, and Cat6a cable, among other Ethernet standards.
- Ease of Use: Both do-it-yourselfers and experts like them mostly because they are rather easy to install and terminate.
- Reliable Performance: Stable and fast data transfer guaranteed by properly wired RJ45 connectors reduces the signal loss risk.
Knowing RJ45 Wiring Guidelines
T568A and T568B are the two main wire standards used with RJ45 connections. For the eight wires within the Ethernet cable, both standards specify the pin arrangement and wiring order.
T568A Wiring Standard
Often utilized in homes, the T568A standard is known for its fit with both voice and data services. T568A has the following wire sequence:
- White/Green – Pin 1
- Green – Pin 2
- White/Orange – Pin 3
- Blue – Pin 4
- White/Blue – Pin 5
- Orange – Pin 6
- White/Brown – Pin 7
- Brown – Pin 8
T568B Wiring Standard
Commercial settings are more likely to find the T568B standard applied. T568B’s wire sequence is:
- White/Orange – Pin 1
- Orange – Pin 2
- White/Green – Pin 3
- Blue – Pin 4
- White/Blue – Pin 5
- Green – Pin 6
- White/Brown – Pin 7
- Brown – Pin 8
Making Decisions Between T568A and T568B
Although both rules are technically compatible, you should keep consistency across your network. If you are connecting to the present infrastructure, find out which wiring standard is being used right now.
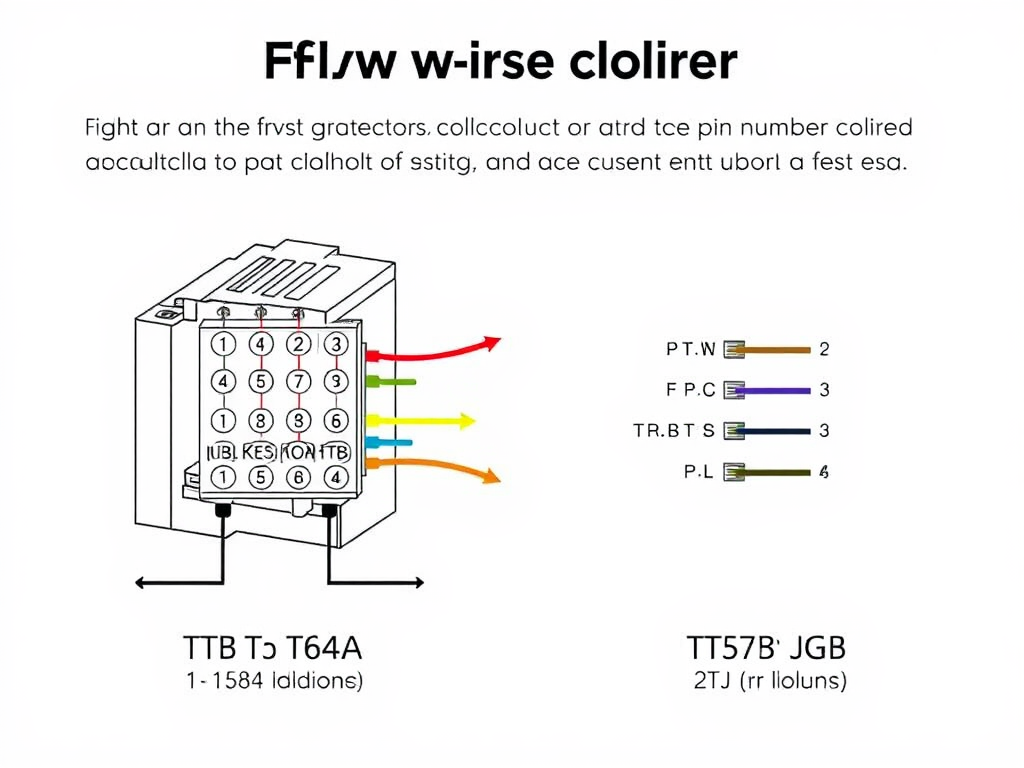
RJ45 Connector Wiring Diagram
This basic RJ45 wiring diagram using the T568B standard helps to show the wiring process:
- Pin 1: White/Orange
- Pin 2: Orange
- Pin 3: White/Green
- Pin 4: Blue
- Pin 5: White/Blue
- Pin 6: Green
- Pin 7: White/Brown
- Pin 8: Brown
Methodical Wiring Guidelines
- Get Your Instruments Ready: You will need a crimping tool, Ethernet cable, wire stripper, and RJ45 connector.
- Ready the Cable: Trim the Ethernet cable to the required length. Cut roughly one inch of the outer jacket to reveal the inner wires.
- Untwist the Pairings: Carefully untwist the pairs of wires and align them using the T568A or T568B criteria.
- Cut the Wires: Ensure they are even and leave roughly half an inch exposed.
- Add the Wires: Making sure the wires follow the proper pin order, slide them into the RJ45 connector.
- Secure the Connector: Use the crimping tool to push the metal pins into the wires, securing the connector onto the cable.
- Verify the Link: Check the wiring to be accurate and the connection to be operational using a cable tester.
Suggestions for Effective RJ45 Wiring
- Make Use of Quality Cables: High-quality Ethernet cables will guarantee dependability and performance.
- Keep Wires Untwisted: Minimize the untwisting of wire pairs to preserve the cable’s integrity.
- Crimping Technique: When crimping, press firmly yet gently to prevent harming the cable or connector.
- Sort Your Cables by Label: Especially with complicated systems, think about identifying your wires for simple identification.
Typical RJ45 Connector Uses
- Local Networks: Home networking systems extensively employ RJ45 connectors to link devices, including PCs, printers, and gaming consoles.
- Commercial Settings: RJ45 connectors are fundamental for networking workstations, servers, and switches used in commercial environments.
- Data Centers: High-density cabling in data centers depends on RJ45 connectors for effective data movement.
READ MORE The Ultimate Guide to Candelabra Bulbs: Illuminate Your Space Stylishly
FAQs
- T568A and T568B differ in what exactly?
The two wire standards used in RJ45 connections are T568A and T568B. The main variation is the color codes applied for the wire order. While T568B is utilized extensively in commercial buildings, T568A is more commonly employed in homes. - On the same network, may I apply both standards?
T568A and T568B standards can indeed be mixed on the same network, but to prevent connectivity problems, each segment must remain consistent. - With what tools should I wire an RJ45 connector?
You’ll need an Ethernet cable, an RJ45 connector, a wire stripper, and a crimping tool to wire an RJ45 connector. - How can I find out whether my RJ45 cable is correctly wired?
A cable tester can let you confirm that your RJ45 cable is wire-wise accurate. The tester will signal whether every connection is operating as it should. - What typical errors arise when wiring RJ45 connectors?
Typical errors include incorrect wire order, too much untwisting of pairs, and insufficiently secure crimping of the connector.
Conclusion:
Anyone hoping to establish or manage a wired network must first understand the RJ45 connection wiring schematic. Following the correct wiring standards and recommendations will help you to guarantee the best performance and dependability in your network configuration. Whether you enjoy do-it-yourself projects or are a professional installer, knowing RJ45 wiring will enable you to build flawless connections for any application.